Thursday, July 31, 2014

How To: Make a Pincushion Jar


Of all the things I own in my crafty stashes, I didn't own a pincushion.  You can imagine... this resulted in a lot of lost pins later being found by my feet, and in even worse scenarios, the palm of my hand.    What I really wanted was a pincushion jar, so I could put my safety pins along with my needles and stick pins.  Try as I might, I couldn't find anything like this in my local hobby stores.... so it had to be DIY'ed!


This project is relatively simple, and a beginner could easily do this!
You will need:
A scrap of fabric, mine was about 4"x4"
A jar - I found mine half off at my hobby store for less than $1
A piece of cardboard
Thread and needle
A pen
Ribbon
Stuffing
Hot glue

Most of the things I had on hand already, and the only thing I had to buy was the jar - so this project cost me less than $1!  It would be easy to make this project completely free!  You could always save a jar from the trash when you finish up that pasta sauce or jelly, save some cardboard from a box you are going to throw away, or save those sad beat up stuffed animals that your kids murder and reuse their stuffing (yep, I do it!).


My lid wasn't like one of those mason jar lids that come apart into two pieces, but if yours is you can skip this step and just use the inner part of the lid as your cardboard piece instead.  Take your lid, and trace around it onto your cardboard, then cut it out.  It should fit on top of your lid without going over the edges - trim it down if you need to!  We aren't looking for perfect, just no overhang.

Next, we want to add our stuffing so our pins have something to punch in to.  I took a wad of stuffing and balled it up as tightly as possible.  I like my pincushions very very firm!  Then you'll take your scrap fabric (be sure it will fit all the way around the fluffings and all edges will hit underneath the cardboard!)  and cover the stuffing.


For me it was easiest to put the fabric over the stuffing, then flip it over so that I had access to the bottom.  I began sewing with a running stitch, first hitting each corner, then going around again and again, each time gathering the fabric in tighter by putting the needle and thread through loose areas of the fabric.  I probably went around about three times before I was satisfied.  This doesn't have to be pretty!  Just strong enough to hold it together.  Flip it over and voila!  Pincushion top!


Now you'll want your hot glue.  Center your top onto your lid, and glue that sucker down really well.  Be careful if your lid is metal, it will conduct heat from the glue while it cools and you don't want to burn your fingers!


Now, you could technically be done.  But I like my work to have a pretty, finished look about it.  I didn't like that seam of space between the cushion and the lid.  I took a drop of hot glue and attached the end of the ribbon to the lid near the seam between the lid and cushion, then wrapped it tightly around twice.  I made sure all the metal was covered, then I ended the ribbon at the same area where I began wrapping.  Cut and glue!  To hide the ribbon seams, I made a small bow, and attached with glue.


Now you're done!  Super cute, right?  This has come in so handy, and I have been using it for about ten weeks now with no wear or tear on it.

Thanks for looking - and have fun crafting!

Thursday, July 24, 2014

Back from Break!

Goodness, it's been a while since my last post!  I didn't mean to take the summer off from blogging, but it seems I almost did.  I have a lot of projects lined up for the next few entries.  Let's just say, life  has been super hectic!  A lot has been going on.  We found out my sister was pregnant with twins as well (yay, a boy and girl!) So I have been planning her baby shower, which happens to be on Saturday!  Also, I have upgraded my camera to a Nikon D5200 24.1 MP digital SLR camera.  We also built our office!

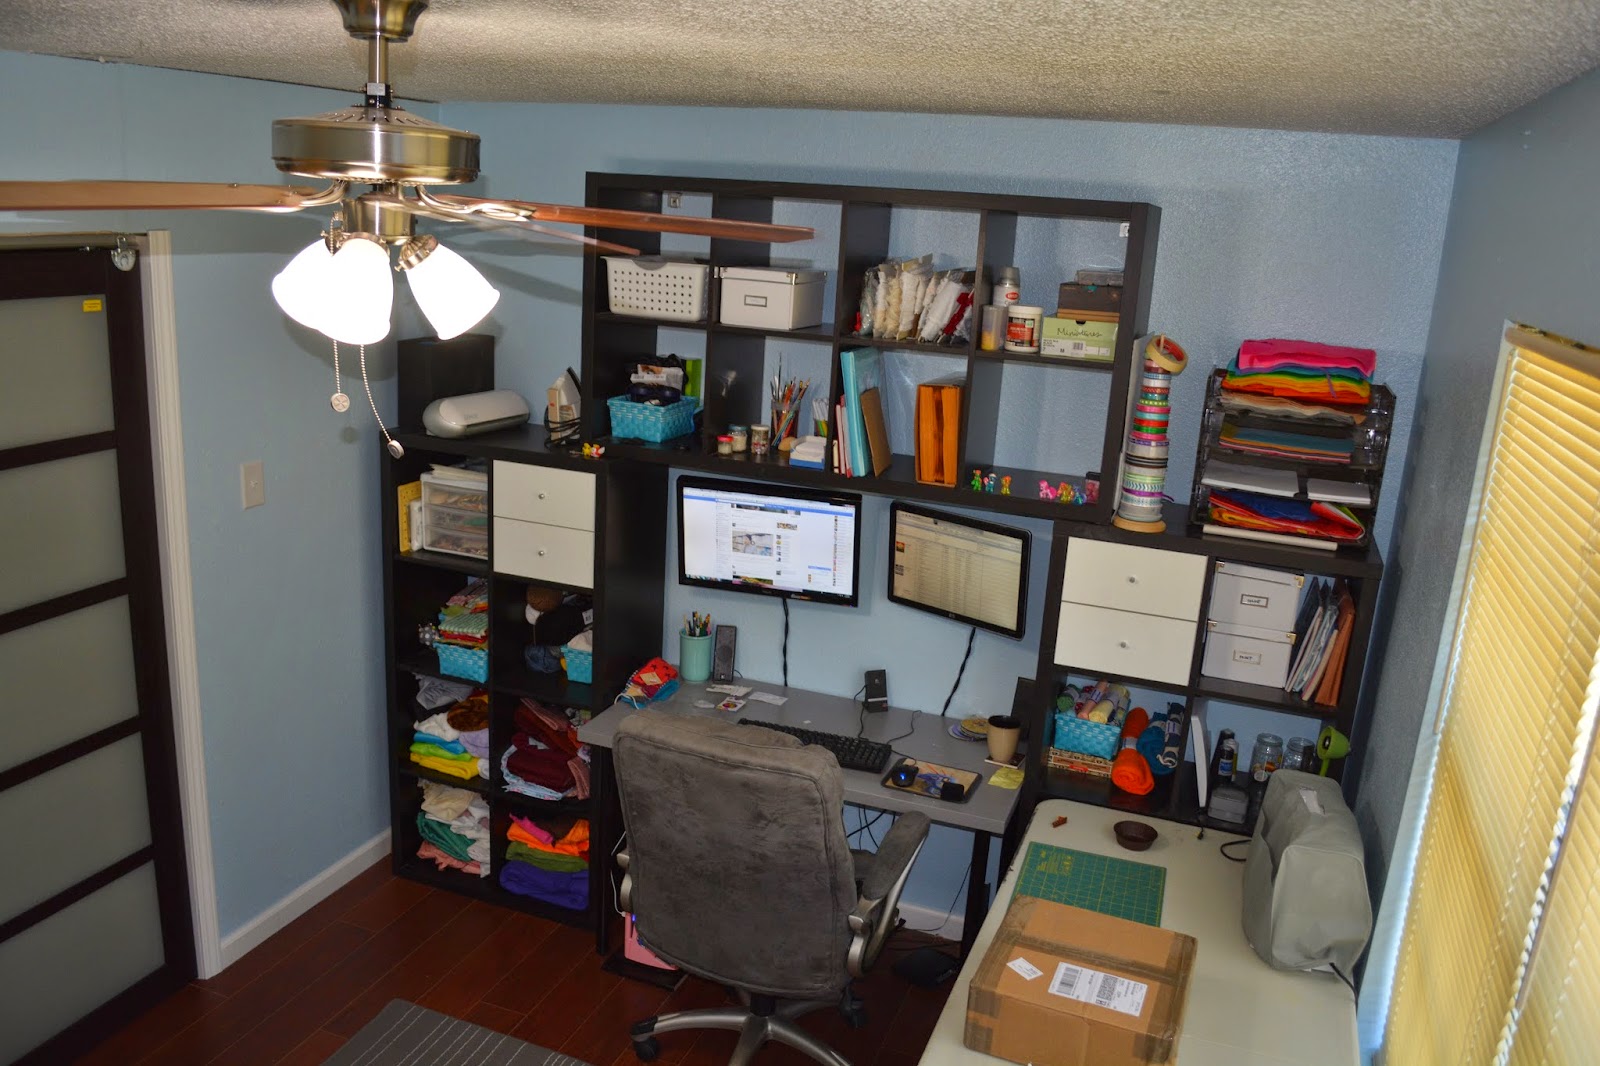
Our living room was enormous... and I mean GIANT.  Crazy giant.  It was a lot of wasted space.  So we decided to put up some walls in the living room to create an office, so I'd have a dedicated business area.  That took weeks!  You can see the before/after below!  I am going to dedicate a post to it once it's completely done, we are still waiting on the crown molding and the rest of the trim for the doors.  What's GREAT about my new office is the upgraded lighting! We opted for natural colored light bulbs (instead of those yellow tinted ones) so my pictures for the blog will be super updated and fancy-shmancy with my new camera.


And here's a preview of the projects coming up!


I'll have to do a post on some of the baby shower prep I did, too.  It's super cute!

Also, I have a slight confession... yes, I am a complete dork.  I have been doing costume work for a con called Geekfest that I will be attending with my (also super geeky) husband next month.  May do a few posts about that, too - costuming is fun, and is sewing, afterall!!

Oh, we also adopted a new kitty, Midna!  You can see her in some pictures, being super "helpful".

Until a bit later this week, after baby shower madness, when project how-to's resume!


Wednesday, April 30, 2014

The Twin's My Little Pony Themed Second Birthday Party

And birthday month comes to a close!  This month has been insane!  My husband's birthday, along with the twins and my grandfather's... not to mention Easter.  Nuts!  But it's over now, and we're prepping for Mother's Day in two weeks!

I thought I'd share a few pictures of the twin's birthday party.  As you know, it was My Little Pony themed.  They had a really good time!  I'm sad I didn't get more pictures, but I was so busy.  


This was our table spread, nothing too amazing!  I had tulle in rainbow colors coming down from the ceiling against the windows as a backdrop, with white paper lanterns to simulate clouds at the top.  I loved it.  When the light went though it, it was gorgeous!  Decorating was a lot simpler than I thought it would be.  I just got all the girl's Ponies and placed them everywhere - even on the cake!  I believe in reusing things as much as possible.  The other small detail that was one of my favorites, and I'm sad I didn't get a closer picture of, was the silverware and container.  The kids had a BUNCH of jelly beans from Easter, and I needed something to fill a vase so I could put the silverware in it.  So, I filled up the vase with jelly beans by sorting them by color, and then placing them in the vase in rainbow order.  You can see it in the photo above, really tiny! 


Needless to say, the twins got a lot of gifts.  Our kids are very lucky, and very loved.  We went all out this year, instead of making everything by hand, we saved ourselves some time and bought themed items such as tablecloths.  In the picture above you can see the girl's presents from us.  We took them to Build-a-Bear in Austin and they chose a Pony to make for themselves.  They loved it, and hey! They turned into more decoration!  You can also see their themed outfits.  The girls got a My Little Pony shirt each, which by the way is very difficult to find in 18 month size!  Our girls are small for their age, even though they were full term. Our solution?  eBay. 


For the cake, I kept it pretty simple.  By the time I took this picture, the frosting was beginning to melt from the heat of so many people in our house.  But - still cute!  I made an ombre cake and put the small $4 Ponies on the top, with some small bunting made from felt scraps I had lying around, ribbon and wooden skewers.  Then each girl got one candle to blow out!


Did I say I was getting an office?  Yep!  And my husband is getting one, too!  We have an impossibly large living room in our house.  I'm talking over 20x20 feet. So, we moved our dining table to the breakfast nook (which fits an eight seater table comfortably), and the dining room (which will be my husband's office once we get walls up) is temporarily a play room while we do construction on the living room to make a part of that my office.  Confusing, yes.  I live in a state of flux here, when it comes to construction.  Any way, this is the kid's playroom.  We got a fold out table for extra seating, and you can see our Pinkie Pie pinata being used as temporary decoration before the kids were set loose upon it.  Up on the ceiling is a balloon dragon I made up for my husband's birthday, and he didn't want me to pop him just yet.  He was on-theme, so I kept him out for the party.  There ARE dragons around Ponyville, you know! More on him later in my next post!


 And finally, the pinata.  What kid doesn't like to beat something and get candy for it?  My kids sure do.  However, their daddy had to deal the ending blow!

That was it!  Our My Little Pony twin's second birthday party.  It was a lot of fun, a lot of work, and the kids had a great time so of course it was all worth it.  My son is saying he wants a Sonic or Angry Bird's birthday in September.  We shall see.


Thursday, April 17, 2014

DIY Dry Erase Weekly Calendar Frames


Hi guys!  This week has been super hectic for me, with numerous trips to the doctor with sick kids (my oldest one has spots, even... viruses. Sigh..)  So I have a quick and easy project! I'm a little obsessed with calendars, and keeping track of dates.  It makes life so much easier when I can just look at my notebook and see what's going on that week.  The rest of my family, however, isn't so schedule-oriented.  So, to help, I decided to make this neat little dry erase set of frames!  This took me a little over an hour to do, and cost me less than $10 total.  


For this project, you'll need:

7 frames 
Scrapbooking paper (for each frame)
Alphabet stickers
Scissors
Pen

And that's it!  I went to my local dollar store for the frames.  Can't beat a dollar a piece.  They aren't the highest quality, but they surely do the job!  The stickers and paper I had in my scrapbook box.  I absolutely always check out the clearance section when I go to my hobby stores.  Their sticker packs I find there may be missing a few letters here and there, but the price reduction is well worth a missing sticker. 


To begin, take apart your frames.  You can keep the glass in the front of the frame, you don't need to remove that.  Simply take the back of your frame, and trace it on to your scrapbook paper.  Then cut it out!  It should fit perfectly into your frame.  Double check before adding stickers!


Once you're sure the paper fits, spell out a day of the week on your paper with the stickers.  Remember when you do this, there is a lip on the frame that will cover part of your paper, so don't put the stickers directly in the corners or they will be covered up a bit!


Put the paper into your frame, close it up and voila!  You're done!  Now just to repeat it six more times with the other days of the week!  


The twins had a blast with this one.  They didn't get to help much, but they thought they were (which was adorable and made them happy!)


Once you finish all of your frames, hang them up!  You can use any old dry erase marker on the glass, it will wipe right off.  You can also use ribbon, decorative stickers, or anything else that will fit under the frame to decorate these and make them super cute!  

I'm working on a few stuffy patterns, so those will be up soon! Happy crafting!

Monday, April 7, 2014

Baby Name Embroidery Hoop Art


The twin's birthday party is coming up, and one of the people we have invited has just had a baby girl.  I felt like I couldn't leave her out, but she is much too small for a goody bag like her brother would be getting... so I went to Etsy to see what was trending for baby!  I saw a ton of these embroidery hoops with baby names, but they were charging an arm and a leg for them.  So, to the scrap closet I went!  You can make your own hoop, too... If you know basic sewing like a back stitch, and can use a pair of scissors, this is completely easy (and cheap!)


For this project you will need:
Scissors
An embroidery hoop (I used a 6" wooden hoop)
Fabric to fit your hoop
The name you want to use, printed
A writing utensil
Felt, soft and stiff
Thread (optional: Embroidery thread)
Needle
Ribbon (optional, for hanging)


You'll of course want to start with the prep work!  Go on to your computer and choose a font you like (one that you think will be easy to cut out).  I used Pump Demi Bold in Photoshop for my text.  Choose a size text good for your sized hoop.  The longer the name, the larger the hoop you will need. Print!   You will then cut out the letters of the name, and trace them on to the felt you chose for the name.  Be sure you flip the letters backwards when you trace.  This way, if any marker/pencil/what have you is left on the letters after you cut them out, it will be on the back side of the felt!  For the bunting, you will need to cut out triangles of different colored felt.  Mine were a bit over an inch a piece.


I used cotton quilting fabric for the background of this hoop.  Wash, press and stretch your fabric inside of the hoop you want to use.  Before you lay down your felt pieces to sew, be sure your screw is at the very top, so it will hang straight later. I used three strands of embroidery thread and a running stitch to sew the bunting on, using three stitches per each triangle.  For the name, I used a back stitch and three strands of embroidery thread.  I simply stitching through the middle of each letter.


Backing your embroidery hoop is an optional step.  Some people like to leave their hoops open, but I prefer to close mine to give them a more finished look.  I use stiff felt for backing.  Simply take the inner circle of your embroidery hoop (preferably before you start making your project) and trace around it onto the stiff felt.  Then cut the circle out.


Next, you'll need to fold the fabric into the back of the hoop, like the photo above.  Use a running stitch to tightly hold the fabric into place.  Then place the felt circle you cut out earlier over the back of your hoop.


Start by bringing your thread through from the back side of the felt, then use a whip stitch around the entire felt circle securing it to the cotton fabric underneath!


Usually I use a matching thread, so the stitches are less visible, but I used a nice pink so you could see what it looks like completed!  I had the twins "helping" me ... they seem very amazed by sewing, so please excuse the wonky stitches.


Since you can't hang your closed embroidery hoop by the back anymore, you will need some other way to hang it up.  I make a ribbon hanger.  It's really simple!  Just take about one foot of ribbon, and double it over.  You will want to tie a slip knot about half way down the length of your ribbon.  After this is done, place the knot behind the screw at the top, and tie a bow around the screw, underneath it.  


It should look like this when you're done!  Just trim  up the ribbon and you have a hanger!


Ta-da!  Super cute, right?  I think I'm getting a bit obsessed with hoops, now I want to make an entire wall of them for my house...

Sunday, March 30, 2014

A Budget Dresser Re-do


There has come an age in every single one of my kid's little lives thus far, where they have decided the most fun they can have is throwing all their clothes out of their dresser drawers and then climbing into them... and jumping.  You can imagine the havoc that has been wreaked upon their poor dressers.  The twins even have gone so far as to climb into one drawer together, and with their forces combined... broken the drawer.  I will admit, we didn't get them the best furniture.  Budgets are a pretty strict thing in my household, what with one full-time income and five of us total.  I have to cut corners and save a few dollars where I can (and honestly, who doesn't?)   But, in the past few weeks they have efficiently broken the dresser beyond repair, and it was relegated to their closet until it could be replaced.

Well, my mother in law got wind that the kids had demolished their dresser, and she told me she had one at her house that we could have.  She also warned me it was ugly.  Ugly? Fine!  I can do ugly, as long as it is temporary and can be used!...


Then this showed up at my house.  I about had a heart attack when it came in the door.  No one told me it was water damaged, scratched, painful to look at and belonged on the side of the road waiting for the garbage truck to haul it away.  Okay, maybe that's a bit harsh.  But... ugh.

After a few deep breaths, and a mild panic attack, I figured I could at least give it a face lift.  I see people using Modge Podge on the worst furniture in the world on Pinterest all the time!... I could totally do that (I hoped).  

For this project I used:
One large jar of Modge Podge
Two yards of cotton fabric
Three cans of spray paint
Razor blade
Sandpaper
2" drawer handles
and of course... a dresser

This project took me an ENTIRE dedicated weekend.  Phew!

I had two big jars of Modge Podge my grandmother gave me forever ago (I only used one big one), fabric is always in my fabric stash, sandpaper I nicked from my husband and paint I picked up for less than $15 at my local home improvement store.  I had extra handles from my kitchen makeover when I got new cabinets.


Well, first I got my husband to help haul this bad boy into the garage.  The worst part of the dresser was the water damage.  It worried me most because the entire dresser wasn't made of solid wood, it was mainly just the frame.  The top, sides, and most of the drawers were made of MDF.  Ever see MDF soak up water?  It swells, and doesn't go back down, leaving you with a giant lump.  I'd never tried to sand MDF before, and Googling how to fix MDF water damage left me with no hope... I just went for it.  And it actually worked! I was pretty pleased with the results.  I sanded down all the lumps, bumps and scratches the best I could.


After everything was as even as I could make it, it was time to put the fabric on the drawers.  Now, listen to my tale of woe!   I highly recommend painting the entire dresser before you Modge Podge the fabric on.  It looks a LOT nicer.  I, however did not know this, until I put the fabric on over areas where I painted, which of course was after I had finished the drawers.  I'll fix it later, after the twin's birthday party when I have less to do.  But it works for now.

I used a sponge brush to put the Modge Podge on the drawers, then layed the fabric down, smoothed it with my hands and then slathered more Modge Podge onto the top of the fabric.  The fabric hung over the edges of the drawers by about 1-2" on each side.  Oh, and I didn't use fabric Modge Podge, either... just high gloss!  I gave it about four hours to dry thoroughly.


Once it's entirely dry, you can use a very sharp xacto knife to trim down the fabric.  It will be stiff, and cut very easily without fraying.  I cut down all of the fabric on the drawers, and I also cut small slits over the holes where the hardware had to go for the drawer handles so the screws could go through.  


Even after all the extra fabric was cut, I still was worried about the kids being able to peel it off.  So, I did one final layer of Modge Podge around the edges I had just cut to ensure it would stick.  Then, I got to wait around some more for this layer to dry.  There was a lot of waiting around...


Then I added the hardware!  I would have preferred more vintage-looking hardware, but beggars can't be choosers and this was still a vast improvement over the 1980's mismatched junk that was there before.


I wanted to preserve the carvings on the top two drawers, and didn't want to Modge Podge fabric over it.  It gave the dresser some much-needed character, and I thought it also added a little bit of a feminine touch which was good for the twin's room.  I used Rust-Oleum's Painter's Touch 2X spray paint in gloss candy pink  to give the drawers a couple of coats of paint.  The MDF simply absorbed the paint... but I felt it gave it a vintage look and ran with it.  


If you notice on the upper drawers, someone had poorly filled in the original handle holes with wood putty.  Even after sanding and painting, the holes still were an eyesore.  So I decided to Modge Podge into the squares where the original handles were to cover it, and it worked out pretty nicely!


For the body of the dresser, I had to use three thin coats of spray paint.  That didn't include the back of the dresser, which I largely ignored because I knew it would always be against a wall.  The top of the dresser had such bad water damage that was impossible to perfect (and I had learned that the exposed MDF would simply suck up the paint instead of letting the paint cover it), that I decided to Modge Podge the top of the dresser with fabric as well.  After hours of layering paint, layering Modge Podge and fabric, and using a new blade on my xacto for a sharp precise cut on the fabric... voila!  The body was also done.  


A vast improvement, if I do say so myself!  It is vintage shabby chic!  The only issues I've had with the dresser so far is that my youngest girl is a daredevil with a death wish and likes to climb on it, then jump off.  (I think we have solved that with moving her bed farther away from the dresser to discourage climbing from one furniture piece to another).   The dresser is now fully functional, much more sturdy than anything we had before, and I can stand to look at it!  I've had no issues with fraying fabric or chipping paint, and I'm extremely pleased with the results.
I'll have to find some other things to re-do...